11 Time-Saving Meal Prep Ideas for Busy People
Meal prepping can feel like a chore, but it doesn’t have to be! With these 11 practical ideas, you can save time in the kitchen while still enjoying delicious and healthy meals throughout the week. Get ready to simplify your cooking routine and take back some precious hours!
Overnight Oats with Fruity Variations
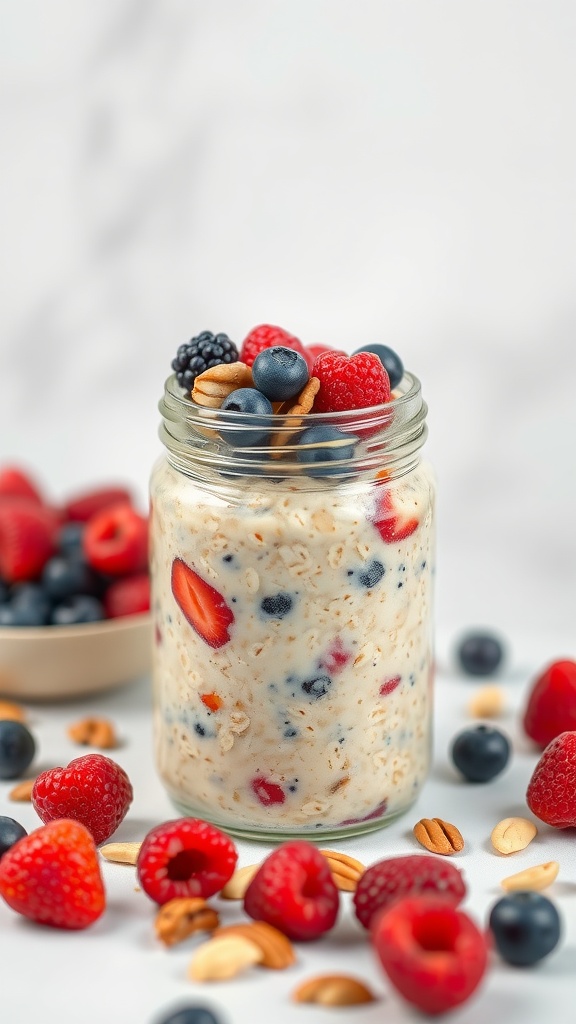
Overnight oats are a fantastic way to kickstart your day with a nutritious breakfast that’s both simple and delicious. This recipe combines rolled oats with milk or yogurt, and the best part is you can customize it with your favorite fruits. The oats soak overnight, making them soft and creamy, ready for you in the morning.
The flavors are refreshing and can vary based on the fruits you choose to mix in. You’ll enjoy a blend of sweetness from the fruits and a satisfying texture from the oats. Plus, it’s an easy meal prep option that saves you time on busy mornings!
Ingredients
- 1 cup rolled oats
- 1 cup milk or yogurt (dairy or plant-based)
- 2 tablespoons honey or maple syrup
- 1/2 teaspoon vanilla extract
- 1/2 cup mixed berries (strawberries, blueberries, raspberries, blackberries)
- 1/4 cup nuts or seeds (almonds, walnuts, chia seeds)
- Pinch of salt
Instructions
- Combine the oats, milk or yogurt, honey or maple syrup, vanilla extract, and salt in a jar or bowl. Stir well to combine.
- Add in the mixed berries and nuts or seeds, gently folding them into the mixture.
- Cover the jar or bowl and refrigerate overnight (or at least 4-5 hours).
- In the morning, give the oats a good stir and enjoy as is or with additional toppings like fresh fruits or a sprinkle of cinnamon.
Frozen Veggie Packets for Stir-Fries
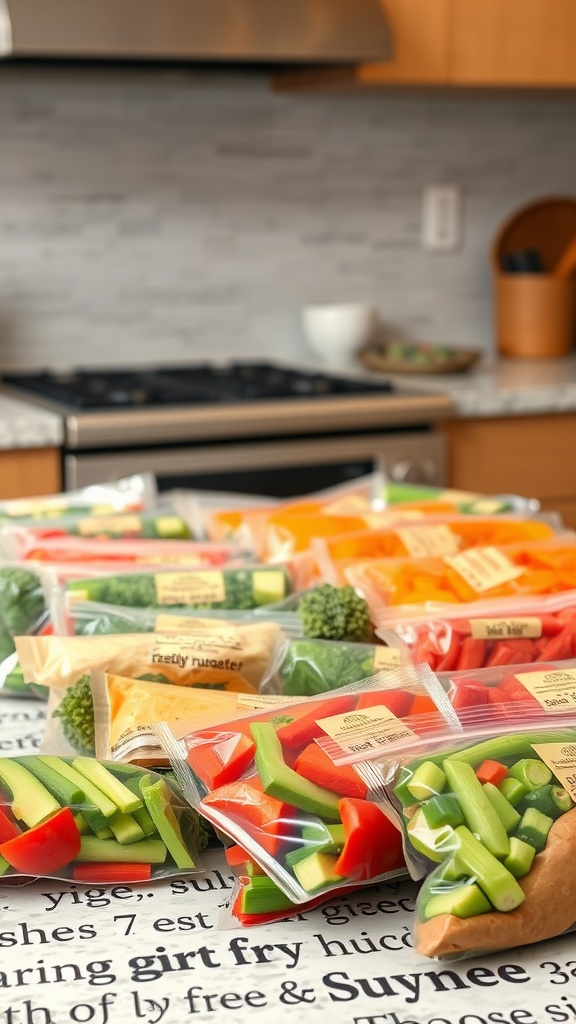
Frozen veggie packets are a fantastic way to simplify meal prep. With a mix of colorful vegetables, these packets create a quick and healthy stir-fry option. They are not only easy to make but also bursting with flavor. You can use whatever veggies you like, ensuring you always have a tasty meal ready in the freezer.
Simply toss the frozen veggies in a hot pan with your favorite protein and sauce, and you’ve got a delicious meal in minutes. This method saves time and helps you eat well, even on the busiest days. Plus, you can customize each packet to suit your tastes!
Ingredients
- 2 cups broccoli florets
- 1 cup sliced bell peppers (various colors)
- 1 cup snap peas
- 1 cup sliced carrots
- 1 cup sliced zucchini
- 1 cup diced onions
- 1 tablespoon olive oil
- Salt and pepper to taste
Instructions
- Prepare the Veggies: Wash and chop all the vegetables into bite-sized pieces.
- Blanch the Vegetables: In a large pot, bring water to a boil. Add the vegetables for 2-3 minutes, then transfer to an ice bath to stop the cooking process.
- Drain and Dry: Remove the veggies from the ice bath and let them drain in a colander. Pat them dry with a paper towel.
- Pack the Veggies: Divide the blanched veggies into freezer bags or containers. Make sure to label each bag with the contents and date.
- Freeze: Place the packed veggies in the freezer. They can be stored for up to three months.
Homemade Soup in Freezer Bags
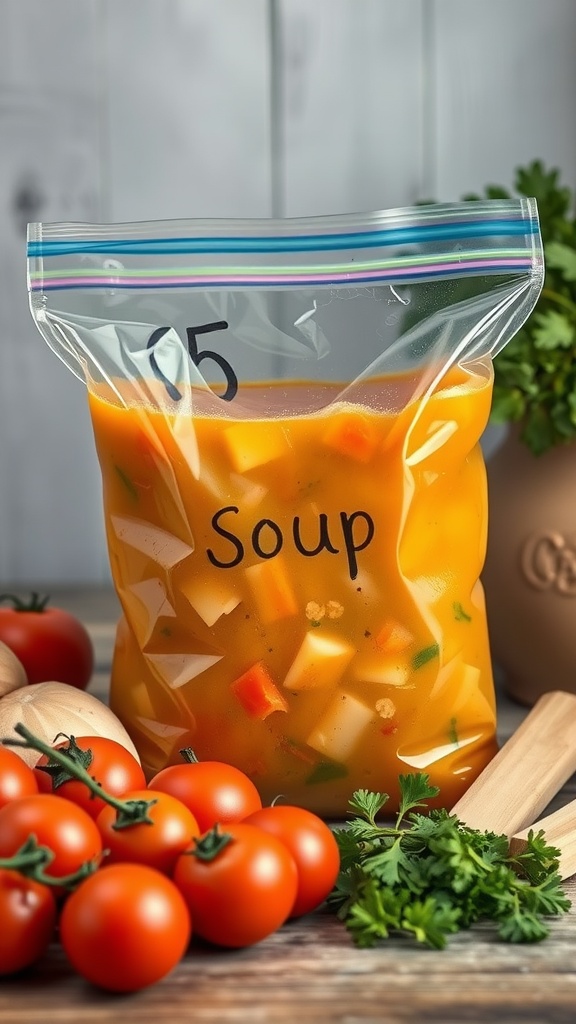
Making homemade soup and storing it in freezer bags is an easy way to enjoy a healthy meal anytime. This method allows you to prepare a large batch of soup that you can simply heat up when you need a quick and satisfying dish. The flavors meld beautifully over time, making each bowl taste even better after a freeze.
Plus, customizing your soup to your taste is a breeze. You can add your favorite vegetables, proteins, and spices. It’s a fun and flexible recipe that everyone can get creative with. Here’s a simple recipe to get you started:
Ingredients
- 1 tablespoon olive oil
- 1 medium onion, chopped
- 2 garlic cloves, minced
- 2 carrots, diced
- 2 celery stalks, diced
- 4 cups vegetable or chicken broth
- 1 can (14.5 oz) diced tomatoes
- 2 cups mixed vegetables (like corn and green beans)
- 1 teaspoon dried thyme
- 1 teaspoon dried basil
- Salt and pepper to taste
Instructions
- In a large pot, heat the olive oil over medium heat. Add the chopped onion and garlic. Sauté until the onion is translucent.
- Add the diced carrots and celery. Cook for about 5 minutes until slightly softened.
- Pour in the broth and add the diced tomatoes, mixed vegetables, thyme, and basil. Bring to a boil, then reduce to a simmer.
- Let the soup simmer for about 20-30 minutes. Season with salt and pepper to taste.
- Allow the soup to cool before transferring it into freezer bags. Lay them flat in the freezer for easy storage.
Marinated Grilled Chicken for Meal Variety
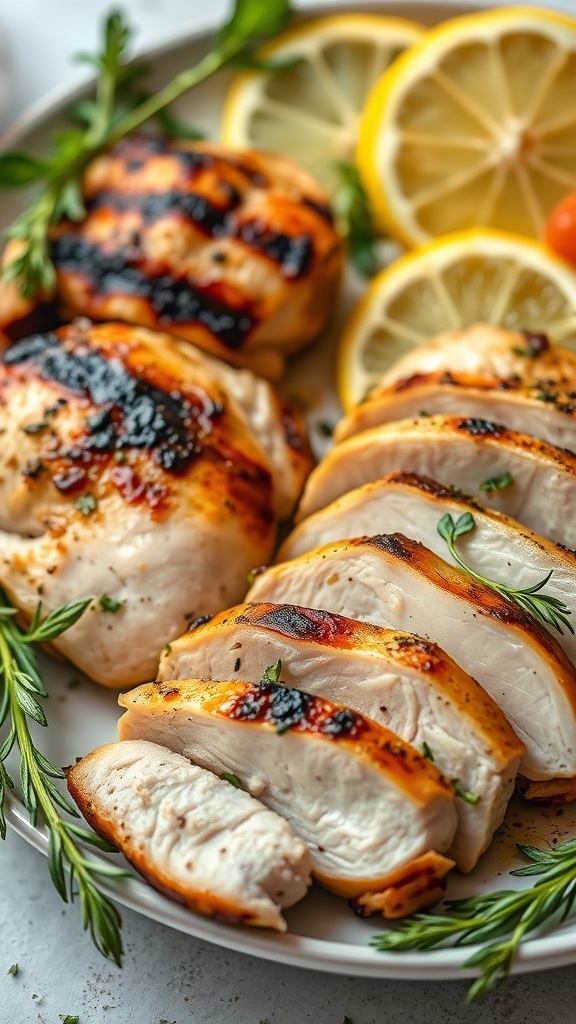
This marinated grilled chicken is a fantastic addition to your meal prep routine. Bursting with flavor from a simple marinade, it offers a perfect blend of tangy and savory notes, making it a crowd-pleaser. Plus, it’s easy to whip up and can be stored for later use, ensuring you have delicious, ready-to-eat meals throughout the week.
Whether you enjoy it in salads, wraps, or alongside roasted veggies, this grilled chicken adapts to various dishes effortlessly. The marinade infuses the chicken with moisture and taste, making every bite enjoyable. Try it out, and you’ll see how versatile and tasty it can be!
Ingredients
- 4 boneless, skinless chicken breasts
- 1/4 cup olive oil
- 2 tablespoons lemon juice
- 2 cloves garlic, minced
- 1 teaspoon dried oregano
- 1 teaspoon salt
- 1/2 teaspoon black pepper
- 1/2 teaspoon paprika
- Fresh herbs for garnish (optional)
Instructions
- Prepare the Marinade: In a bowl, whisk together olive oil, lemon juice, garlic, oregano, salt, pepper, and paprika.
- Marinate the Chicken: Place chicken breasts in a resealable bag or dish. Pour the marinade over and ensure the chicken is well-coated. Seal the bag or cover the dish, then refrigerate for at least 30 minutes, or up to 4 hours for more flavor.
- Preheat the Grill: Heat your grill to medium-high heat. If using a grill pan, place it over medium heat on the stove.
- Grill the Chicken: Remove chicken from marinade, shaking off excess. Grill for 6-7 minutes on each side, or until cooked through and juices run clear. You can also use a meat thermometer to check for doneness (165°F or 75°C).
- Serve: Let the chicken rest for a few minutes before slicing. Garnish with fresh herbs if desired, and enjoy!
Protein-Packed Snack Boxes
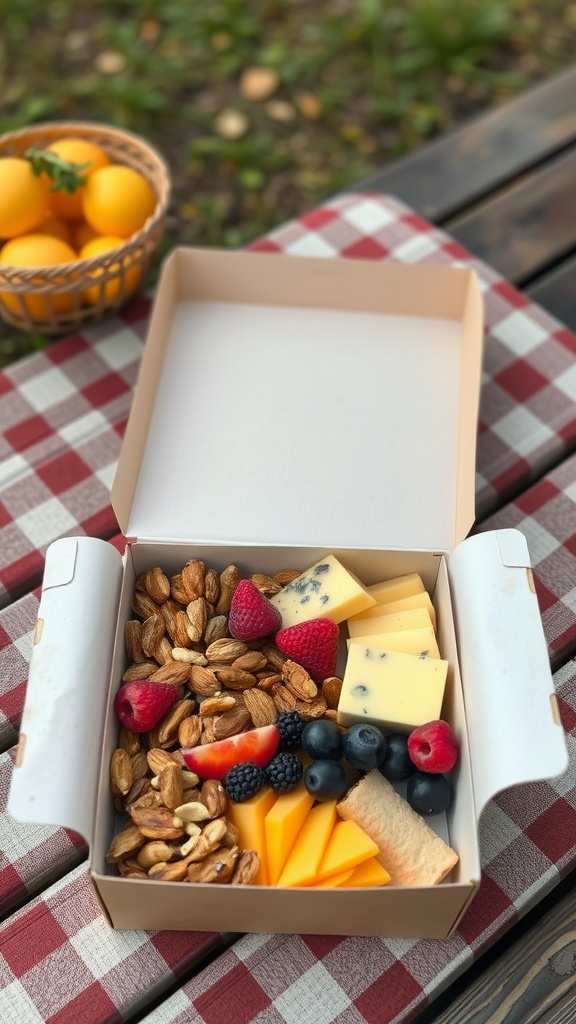
Protein-packed snack boxes are a fantastic way to keep your energy up while satisfying your cravings. They combine a variety of tasty ingredients, offering both nutrition and flavor in every bite. These boxes are not only easy to prepare but also customizable, making them perfect for any taste preference or dietary need.
Filled with nuts, cheese, fresh fruits, and a few crunchy treats, these snack boxes are perfect for on-the-go munching or a quick pick-me-up at home. They are simple to make and can be assembled in just a few minutes. You can enjoy these snacks any time of the day, whether it’s for a mid-morning boost or a healthy afternoon indulgence!
Ingredients
- 1 cup mixed nuts (almonds, walnuts, cashews)
- 1/2 cup cheese (cheddar or gouda, sliced)
- 1/2 cup fresh berries (strawberries, blueberries, raspberries)
- 1/2 cup sliced apple or pear
- 1/4 cup dried fruit (such as apricots or raisins)
- 1/4 cup dark chocolate pieces (optional)
- Whole grain crackers or rice cakes
Instructions
- Gather all your ingredients and a compartmentalized container or box.
- Start by adding a mix of nuts to one section of the box.
- Next, place slices of cheese in another section of the box.
- Fill a section with fresh berries and apple or pear slices.
- Add in some dried fruit for a chewy contrast.
- If you like, sprinkle in some dark chocolate pieces for a sweet touch.
- Finally, add whole grain crackers or rice cakes to round out your snack box.
- Close the box, and it’s ready to go! Enjoy this protein-packed snack box fresh or store it in the fridge for later.
Sheet Pan Dinners for Simple Cleanup
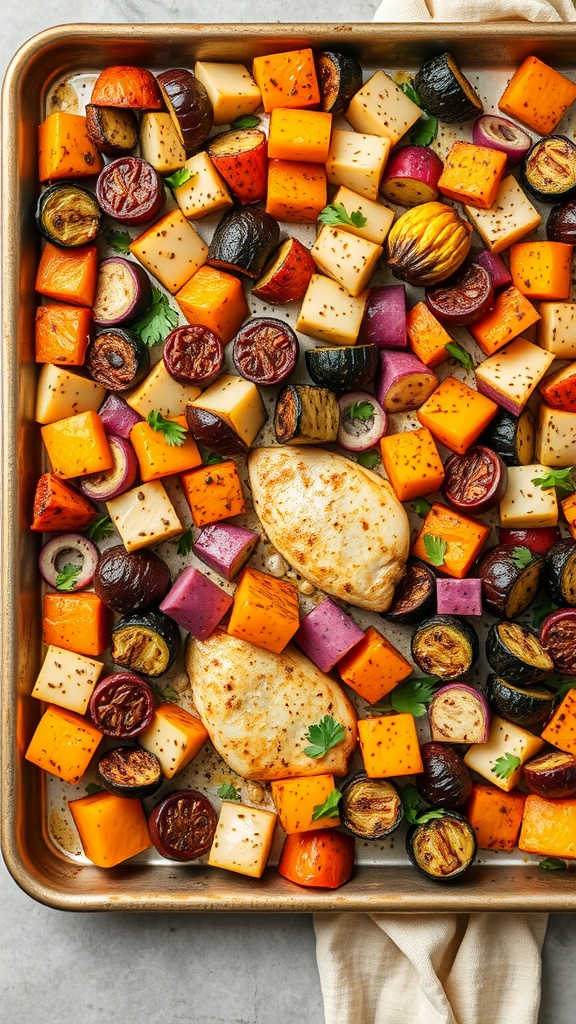
Sheet pan dinners are a lifesaver when you want a hearty meal with minimal fuss. They combine protein and vegetables into one dish that cooks evenly while maximizing flavor. The blend of roasted veggies and seasoned chicken creates a comforting dish that’s perfect for busy weeknights.
This recipe is not only delicious, but it’s also incredibly easy to prepare. With just a few steps, you can have a wholesome meal ready to serve without a lot of cleanup. Perfect for meal prep, this dish provides a great way to enjoy a variety of flavors with minimal effort!
Ingredients
- 2 chicken breasts
- 2 cups butternut squash, diced
- 1 cup red potatoes, quartered
- 1 cup purple carrots, sliced
- 1 red onion, cut into wedges
- 2 tablespoons olive oil
- 1 teaspoon garlic powder
- 1 teaspoon paprika
- Salt and pepper to taste
- Fresh parsley for garnish
Instructions
- Preheat the oven to 400°F (200°C) and line a baking sheet with parchment paper.
- In a large bowl, combine the butternut squash, red potatoes, purple carrots, and red onion. Drizzle with olive oil and season with garlic powder, paprika, salt, and pepper. Toss to coat evenly.
- Arrange the seasoned vegetables on one side of the prepared baking sheet. Place the chicken breasts on the other side and season them with salt and pepper.
- Bake the dish in the preheated oven for 25-30 minutes, or until the chicken is cooked through and the vegetables are tender.
- Remove from the oven, garnish with fresh parsley, and serve warm.
Mason Jar Salads for Easy Lunches
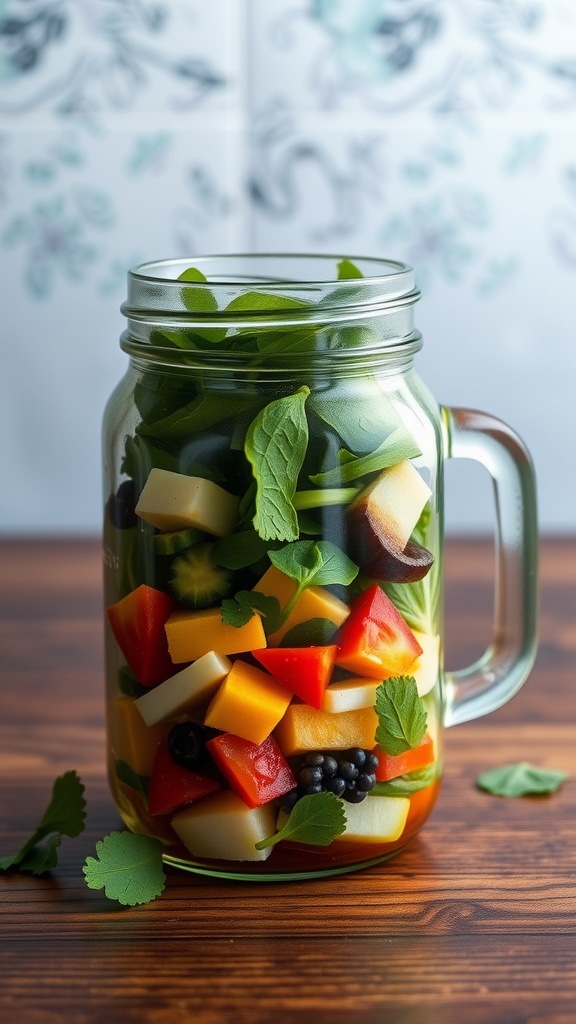
Mason jar salads are a fantastic way to enjoy fresh, healthy lunches without any hassle. They bring together layers of colorful veggies, proteins, and grains, all topped with your favorite dressing. The beauty of these salads is not just in their presentation but also in their convenience. You can prep them in advance and grab one whenever you’re ready to eat!
These salads are crunchy, refreshing, and full of flavor, making lunchtime something to look forward to. Just remember to layer your ingredients properly to keep everything crisp and fresh. Here’s a simple recipe to get you started:
Ingredients
- 2 cups mixed greens (spinach, arugula, etc.)
- 1 cup cherry tomatoes, halved
- 1 cup cucumber, diced
- 1 cup bell peppers, diced
- 1/2 cup shredded carrots
- 1 cup cooked quinoa or chickpeas
- 1/4 cup feta cheese or your favorite cheese
- 1/4 cup salad dressing of choice
Instructions
- Start with the dressing at the bottom of the jar to keep the greens dry.
- Layer in the beans or quinoa next, followed by the shredded carrots.
- Add the bell peppers, cucumber, and tomatoes in that order.
- Finally, top with the mixed greens to keep them fresh.
- Seal the jar and store in the refrigerator until ready to eat. Just shake it up when you’re ready for lunch!
Batch-Cooked Quinoa for Versatile Dishes
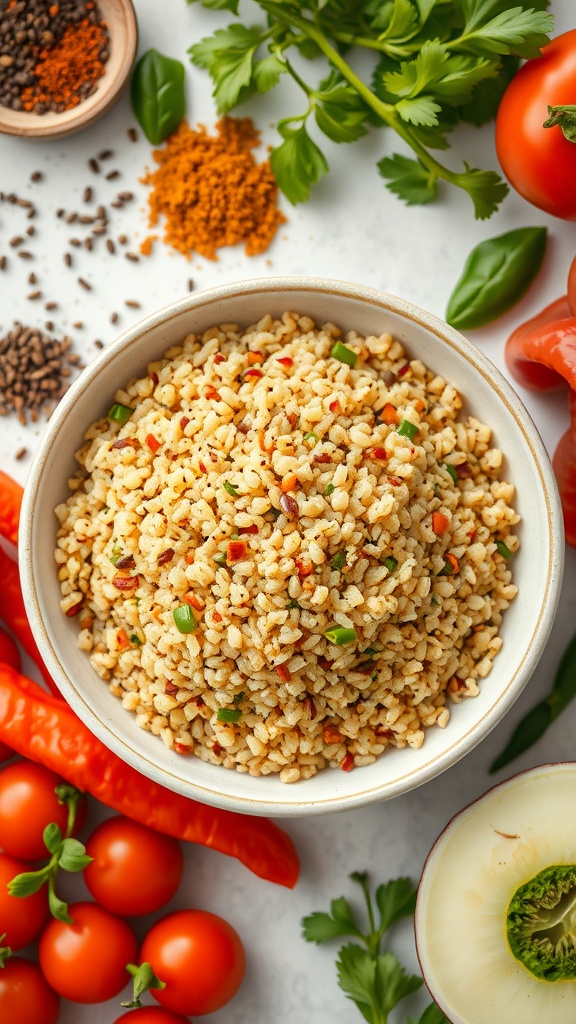
Quinoa is a fantastic base for a variety of dishes, making it a staple for meal prep. It’s nutty, slightly chewy, and packed with protein, which means it keeps you full without feeling heavy. Plus, cooking quinoa in batches saves time and allows for easy customization throughout the week.
This recipe is simple to follow and offers a blank canvas for flavors. You can easily add spices, vegetables, or proteins, making it a versatile choice for lunch or dinner. Enjoy it cold in salads, warm in bowls, or even as a filling for wraps!
Ingredients
- 1 cup quinoa
- 2 cups water or vegetable broth
- 1 tablespoon olive oil
- 1 teaspoon salt
- 1/2 teaspoon black pepper
- 1/2 teaspoon garlic powder
- 1/2 teaspoon onion powder
- 1 cup mixed vegetables (bell peppers, spinach, corn, etc.)
Instructions
- Rinse the quinoa under cold water to remove any bitterness. Drain well.
- In a medium saucepan, combine the rinsed quinoa, water or broth, olive oil, salt, pepper, garlic, and onion powder. Bring to a boil over medium-high heat.
- Once boiling, reduce the heat to low, cover, and simmer for about 15 minutes or until the quinoa is fluffy and the water is absorbed.
- Stir in the mixed vegetables and let sit on low heat for an additional 5 minutes until they are heated.
- Remove from heat and fluff with a fork. Store in airtight containers in the fridge for up to a week.
Versatile Sauces in Small Containers

Making a variety of sauces in small containers is a fun and practical way to enhance meals throughout the week. Each sauce can bring different flavors to your dishes, making every meal feel fresh and exciting. Plus, whipping up these sauces is usually a quick process!
From tangy barbecue to zesty salsa, each sauce can be easily stored and used whenever you want to add a burst of flavor. This meal prep approach not only saves time during busy days but also encourages creativity in the kitchen.
Ingredients
- 1 cup ketchup
- 1/2 cup apple cider vinegar
- 1/4 cup brown sugar
- 3 tablespoons soy sauce
- 1 teaspoon garlic powder
- 1 teaspoon onion powder
- 1 tablespoon Worcestershire sauce
- 1 tablespoon mustard
- 1/2 teaspoon black pepper
- 1/4 teaspoon cayenne pepper (optional)
Instructions
- In a medium saucepan, combine the ketchup, apple cider vinegar, and brown sugar over medium heat.
- Add in soy sauce, garlic powder, onion powder, Worcestershire sauce, mustard, black pepper, and cayenne pepper if using.
- Stir well and let the mixture simmer for about 10 minutes, allowing the flavors to meld.
- Remove from heat and let it cool before transferring the sauce into small containers.
- Store in the refrigerator for up to two weeks and use as needed to add a tasty kick to your meals.
Savory Breakfast Egg Muffins

Savory breakfast egg muffins are a fantastic way to kickstart your day! These little bites are packed with flavor, filling, and can be customized to suit your taste. Perfect for meal prep, they are easy to whip up and can be stored in the fridge or freezer for quick breakfasts on busy mornings.
The combination of eggs, cheese, and your favorite veggies makes these muffins both satisfying and nutritious. They’re simple to make, and you can switch up the ingredients based on what you have on hand. Whether you prefer spicy jalapeños or sweet bell peppers, the choice is yours!
Ingredients
- 6 large eggs
- 1/4 cup milk
- 1 cup shredded cheese (cheddar or your choice)
- 1/2 cup diced bell peppers
- 1/4 cup chopped green onions
- 1/4 cup diced tomatoes
- Salt and pepper to taste
Instructions
- Preheat your oven to 350°F (175°C) and grease a muffin tin.
- In a mixing bowl, whisk together the eggs and milk until well combined.
- Add in the cheese, bell peppers, green onions, and tomatoes. Season with salt and pepper.
- Pour the egg mixture into the muffin tin, filling each cup about 3/4 full.
- Bake for 20-25 minutes or until the muffins are set and slightly golden on top.
- Let them cool for a few minutes before removing from the tin. Enjoy warm or store in the fridge for later!
Homemade Frozen Burritos for Quick Meals
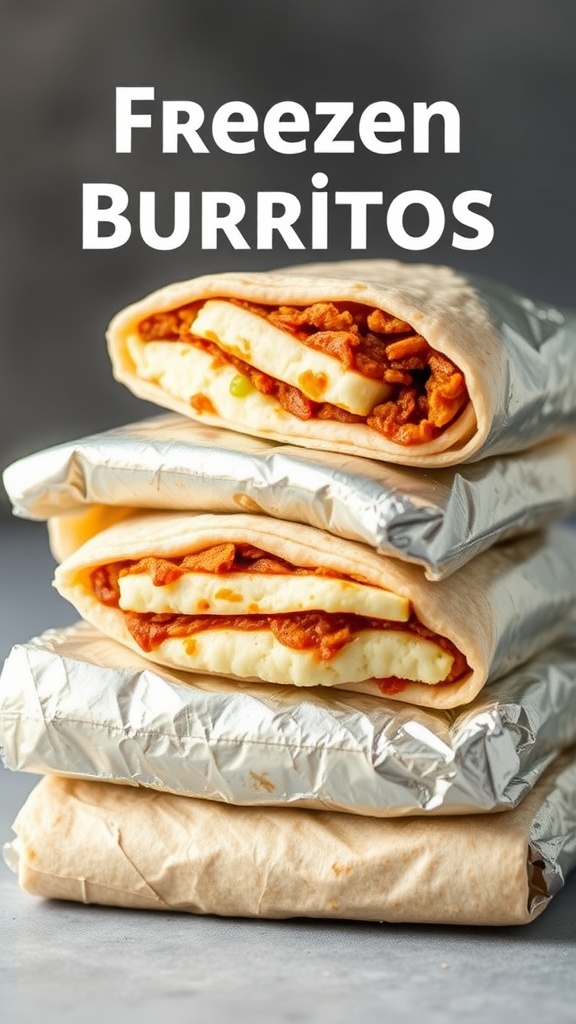
Homemade frozen burritos are a fantastic way to create quick meals without sacrificing flavor. These burritos are packed with ingredients you love, making them both satisfying and convenient. With a variety of fillings to choose from, they cater to different tastes and dietary needs.
Making these burritos at home is simple! You can customize the filling with beans, rice, cheese, or even some protein like chicken or beef. Once assembled, they freeze well and can be reheated in minutes, making them perfect for busy days or late-night snacks.
Ingredients
- 4 large flour tortillas
- 1 cup cooked rice
- 1 can refried beans
- 1 cup cooked and shredded chicken (optional)
- 1 cup shredded cheese (cheddar or Mexican blend)
- 1/2 cup salsa
- 1 teaspoon taco seasoning
- Aluminum foil (for wrapping)
Instructions
- Prepare the Filling: In a mixing bowl, combine cooked rice, refried beans, shredded chicken (if using), cheese, salsa, and taco seasoning. Mix until well combined.
- Assemble the Burritos: Place a tortilla on a flat surface. Add about 1/4 of the filling mixture to the center of the tortilla. Fold in the sides and roll tightly from the bottom up.
- Wrap and Freeze: Wrap each burrito in aluminum foil and place them in a freezer-safe bag or container. Label and date them for easy identification.
- Reheat: When ready to eat, remove the burrito from the foil and microwave for 2-3 minutes, or until heated through. Alternatively, you can bake them in the oven at 350°F (175°C) for 20-25 minutes.